Placing an Order for ID cards
Placing an order for ID cards on Chamera is super easy! You choose the students or teachers, select a template for ID, enter payment and shipping details, and done. In just a few clicks, you can order ID cards right from your device. This article has was curated to guide you through all the steps of the placing order process.
Order ID cards for Students

2. From the drop-down, select Student ID Card
3. It will direct you to the first step of the Place Order process, that is, select Student Students
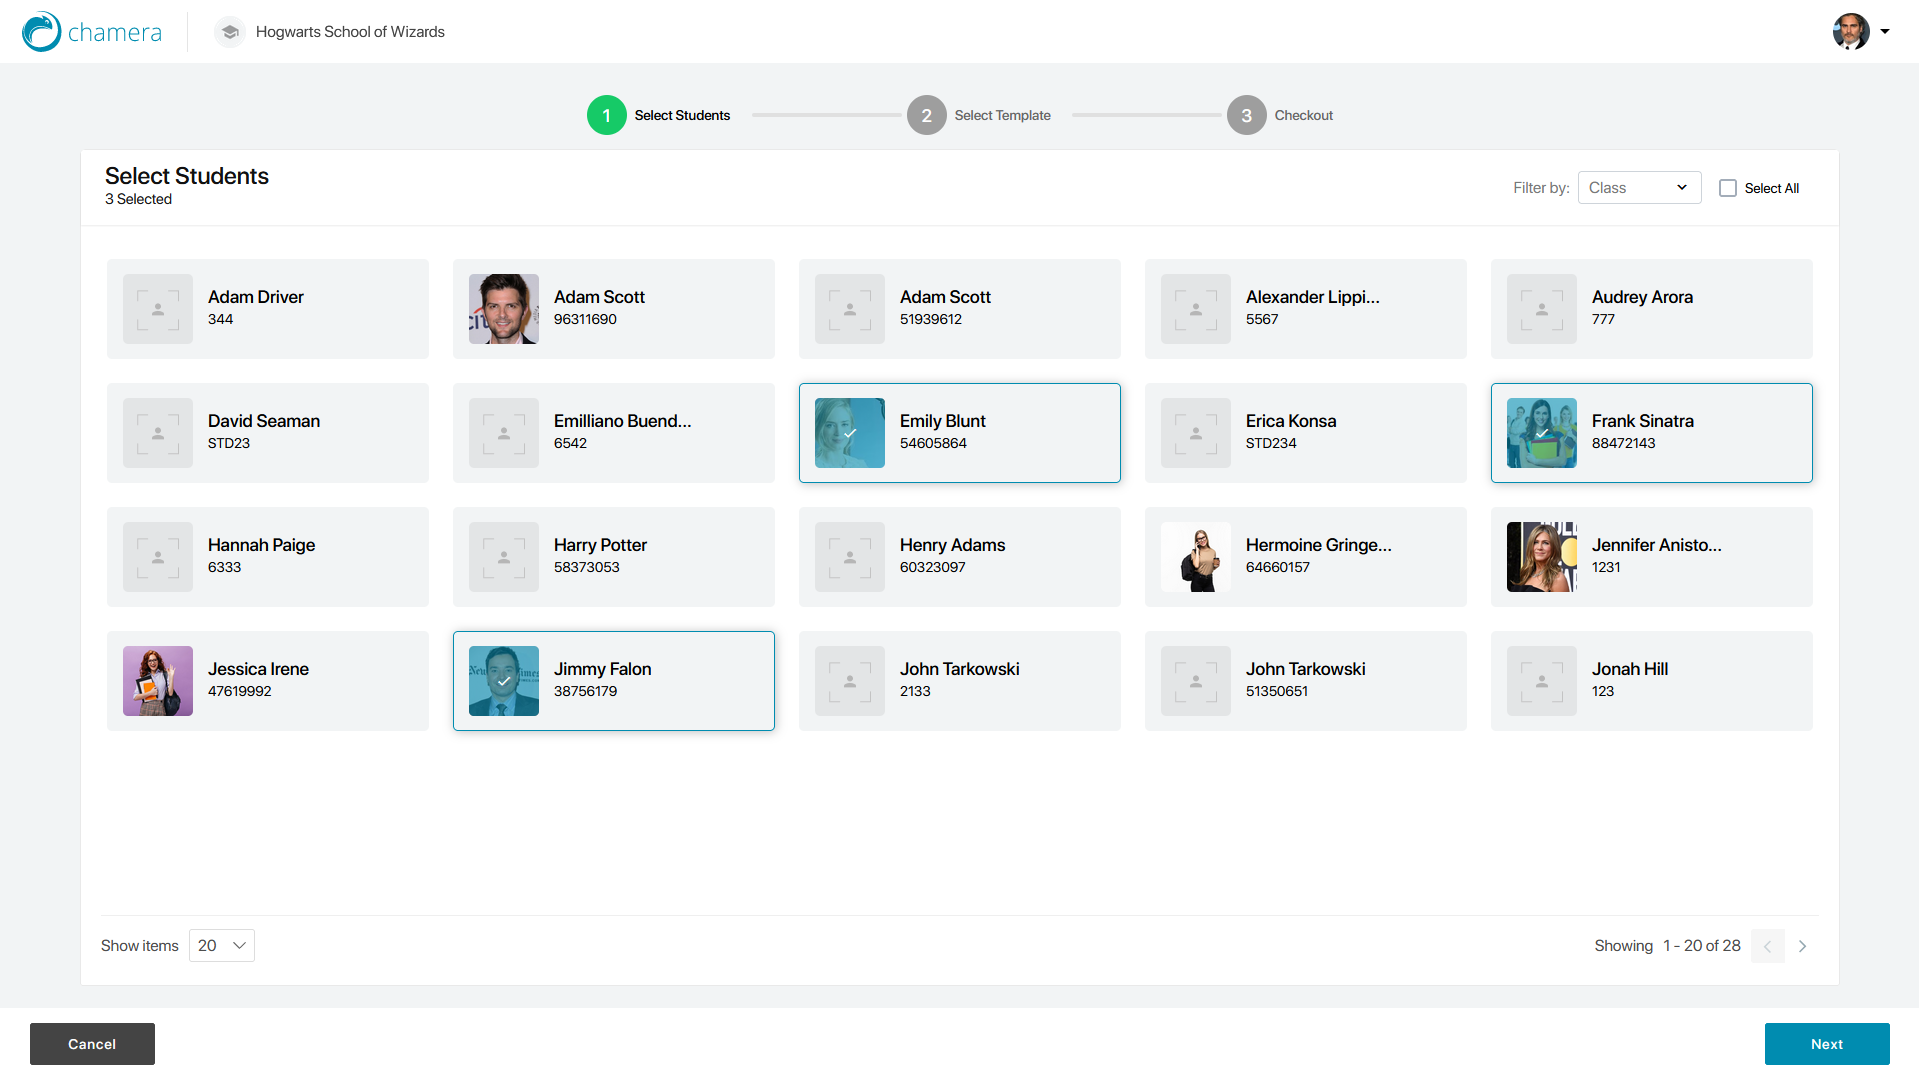
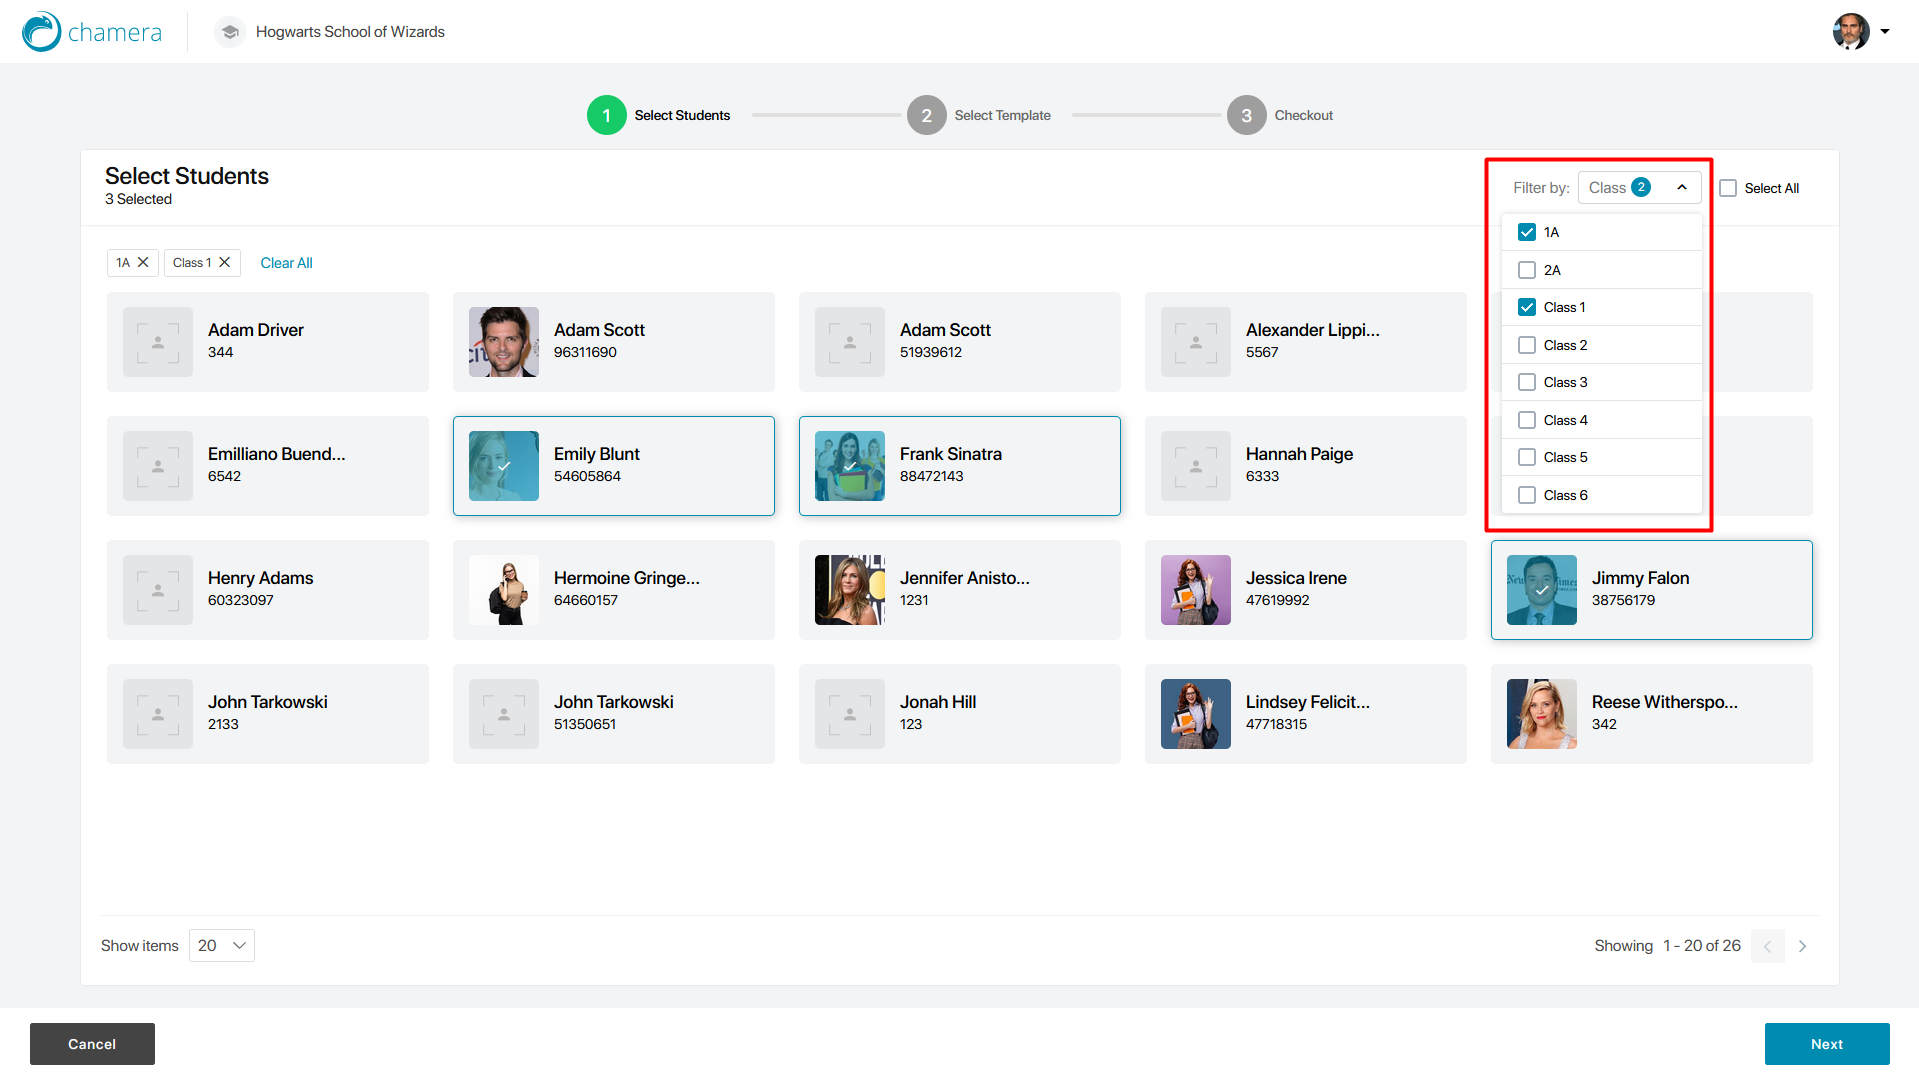
4. Select students you want to order ID cards for from the list. You can also filter the list by class from the Filter By option
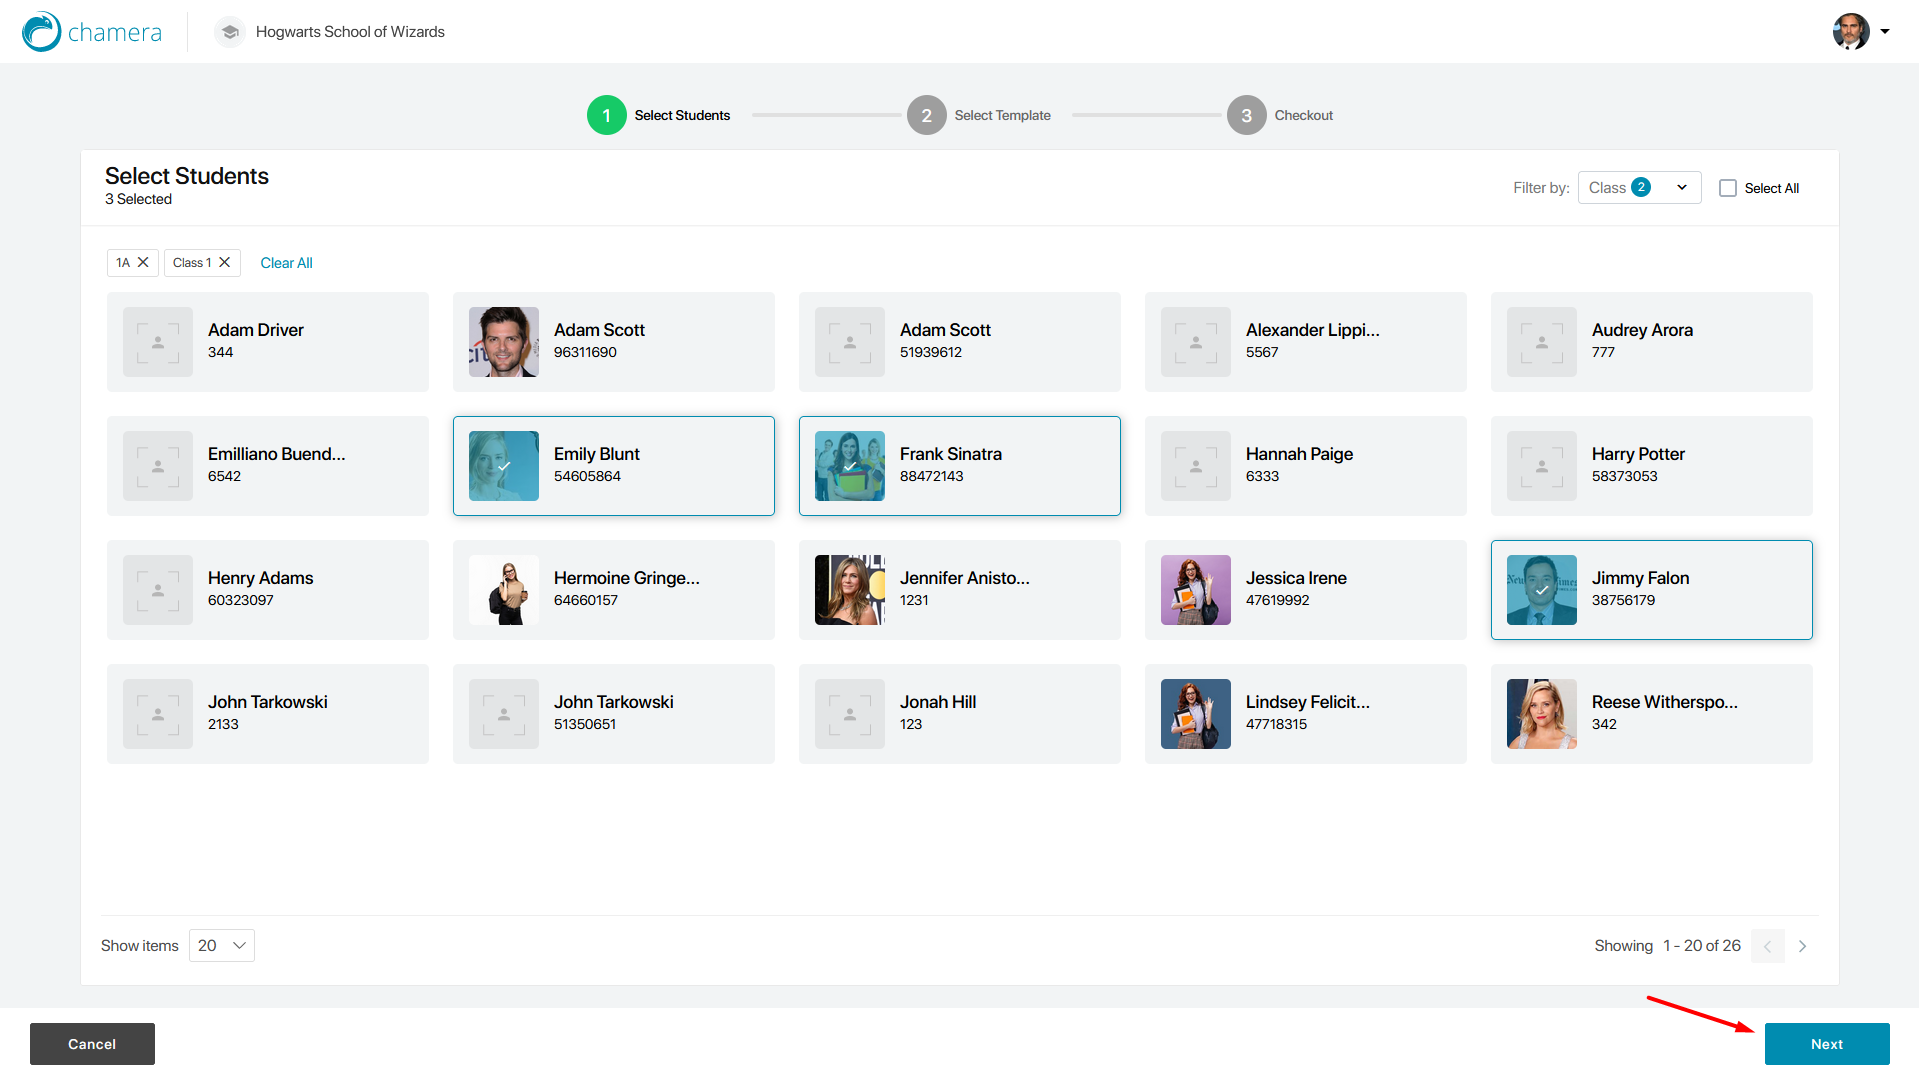
5. After selecting students, click on the Next button at the bottom right corner, which will direct you to the Select Template step, where you need to pick a template for the ID card
6. Choose an ID card type (With Chip or Without Chip), select a template and then click Next to go to the Checkout page

7. On the Checkout page, provide your billing and shipping details
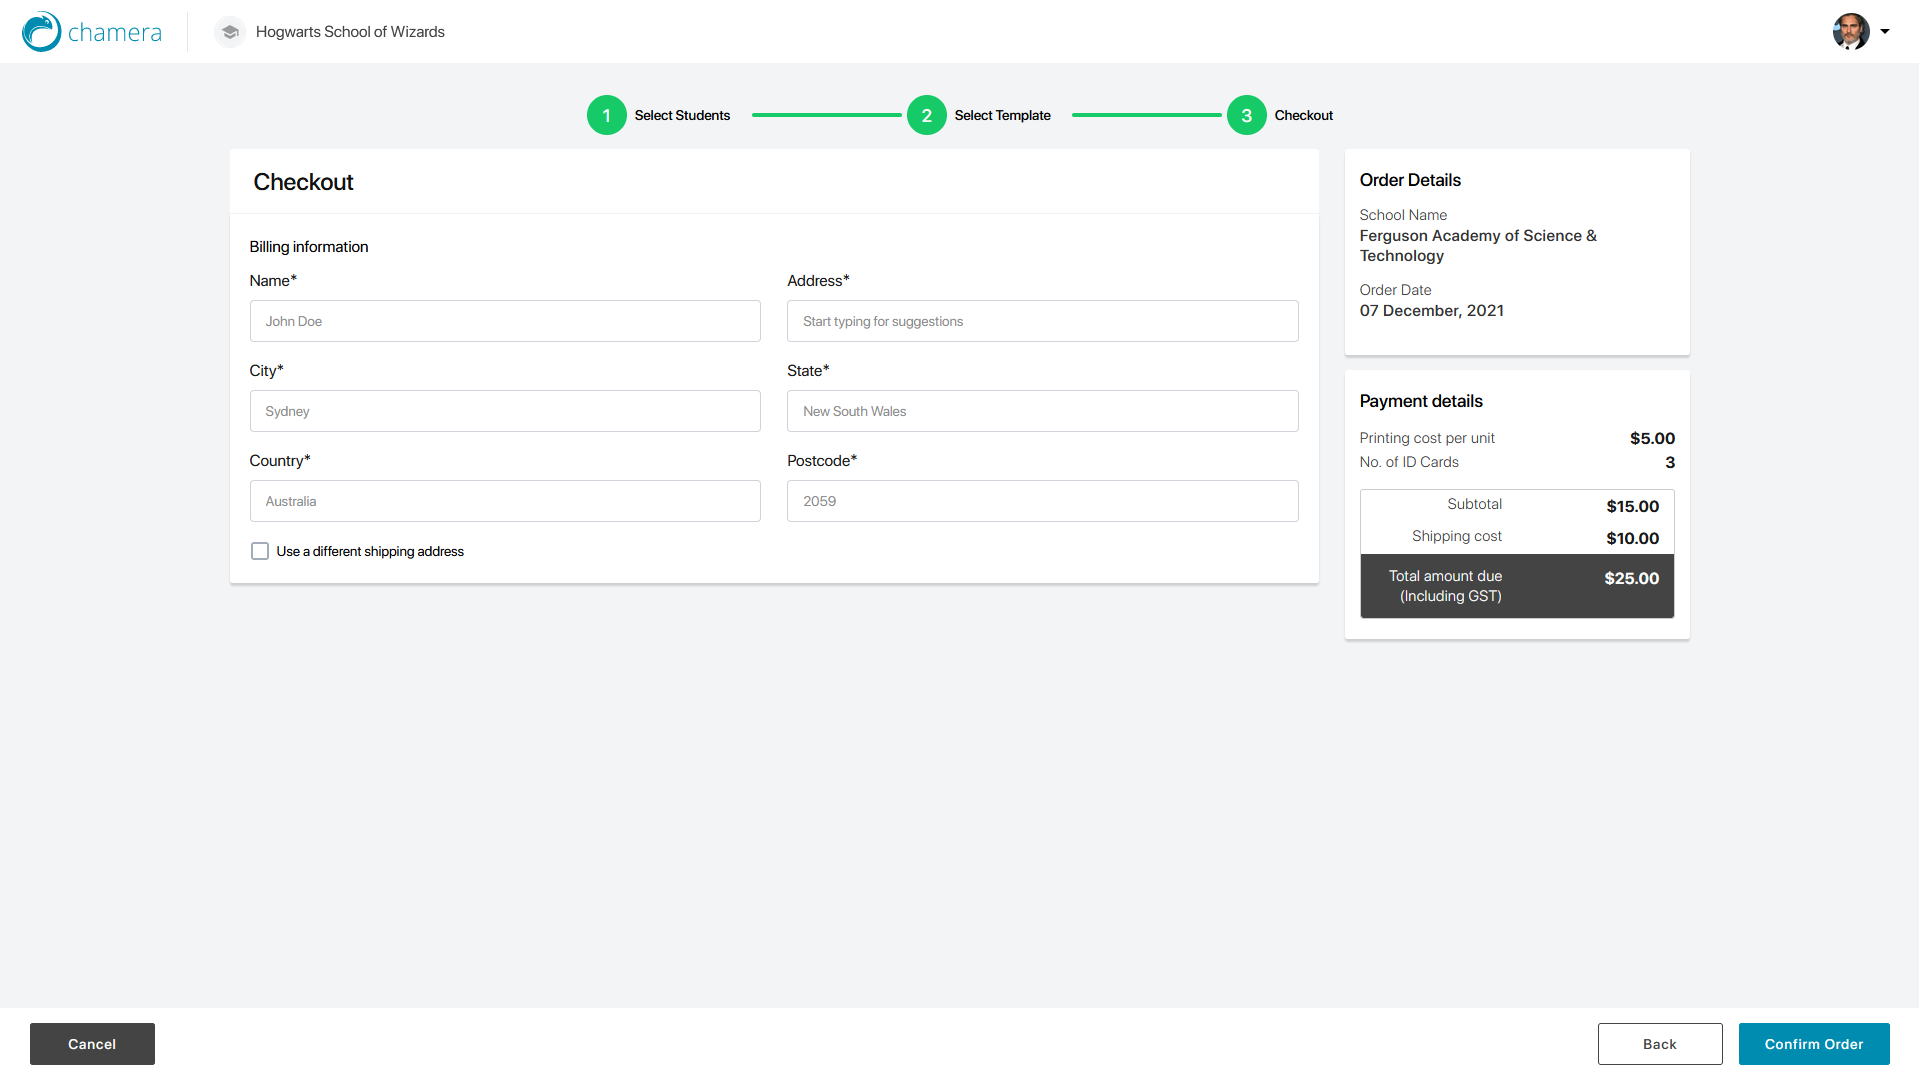
8. When done, click on Confirm Order to go to the Payment page
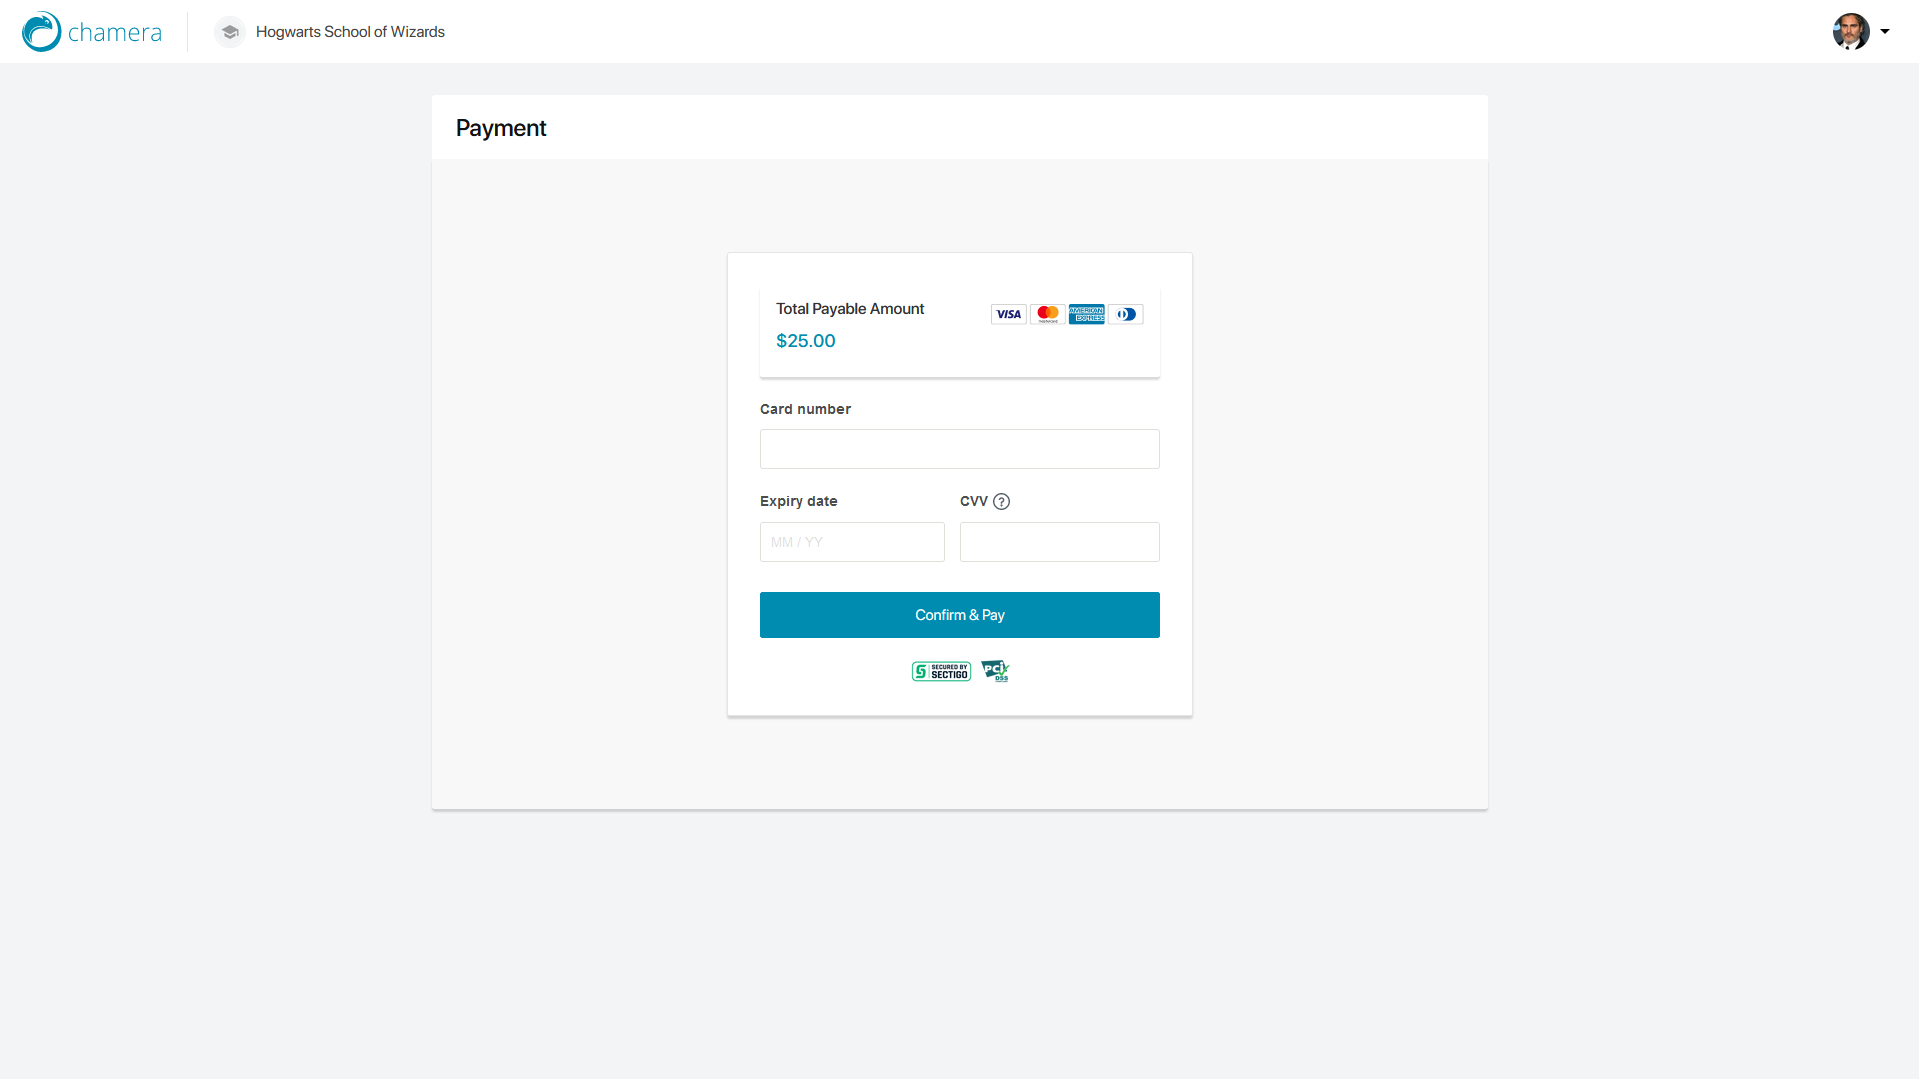
9. Provide your card information and click on Confirm & Pay
10. After clicking on Confirm & Pay, please wait for some time as the system takes a minute to verify the information you provided. You will see a successful payment page when completed.

11. You can check your order details and status by clicking View Order
Order ID cards for Teachers
To place an order for Teacher ID cards:
1. Click on the Place Order button at the top right corner of the Dashboard page
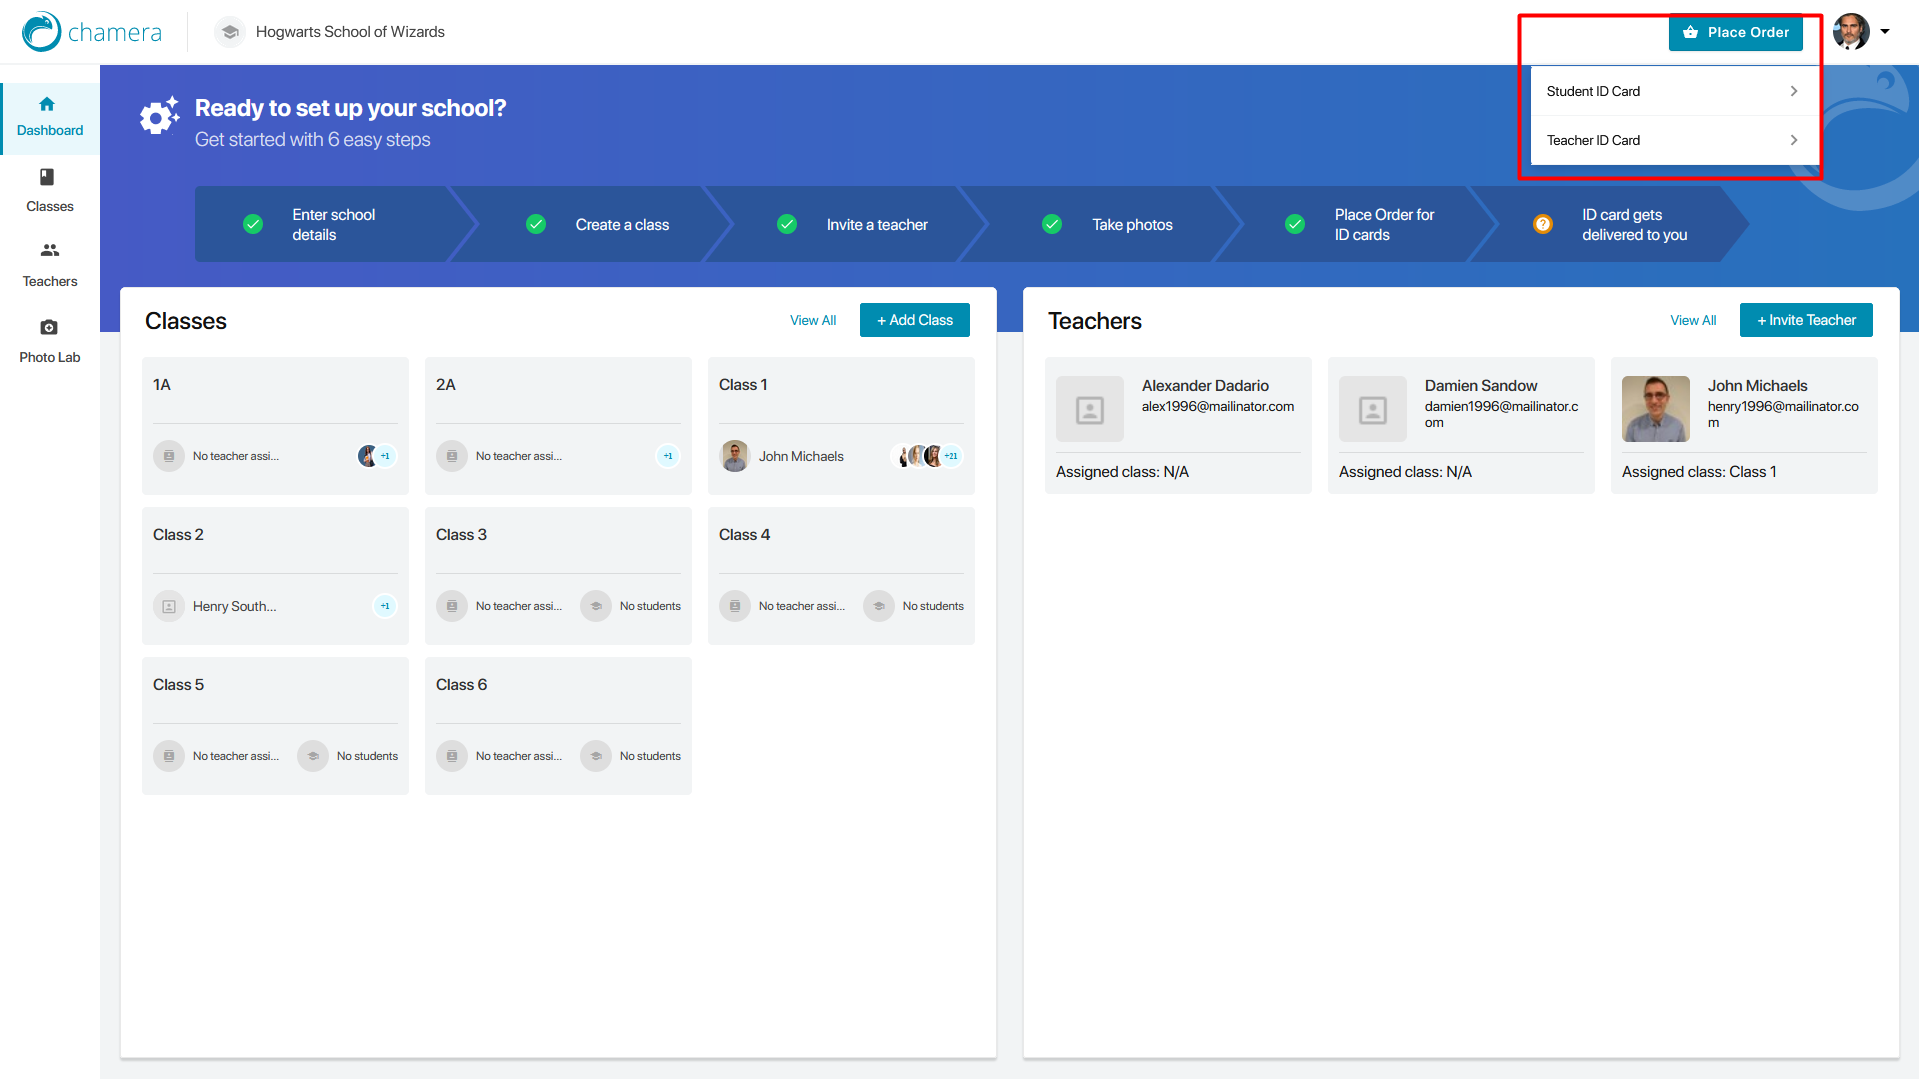
2. From the drop-down, select Teacher ID Card
3. It will direct you to the first step of the Place Order process, that is, select teachers
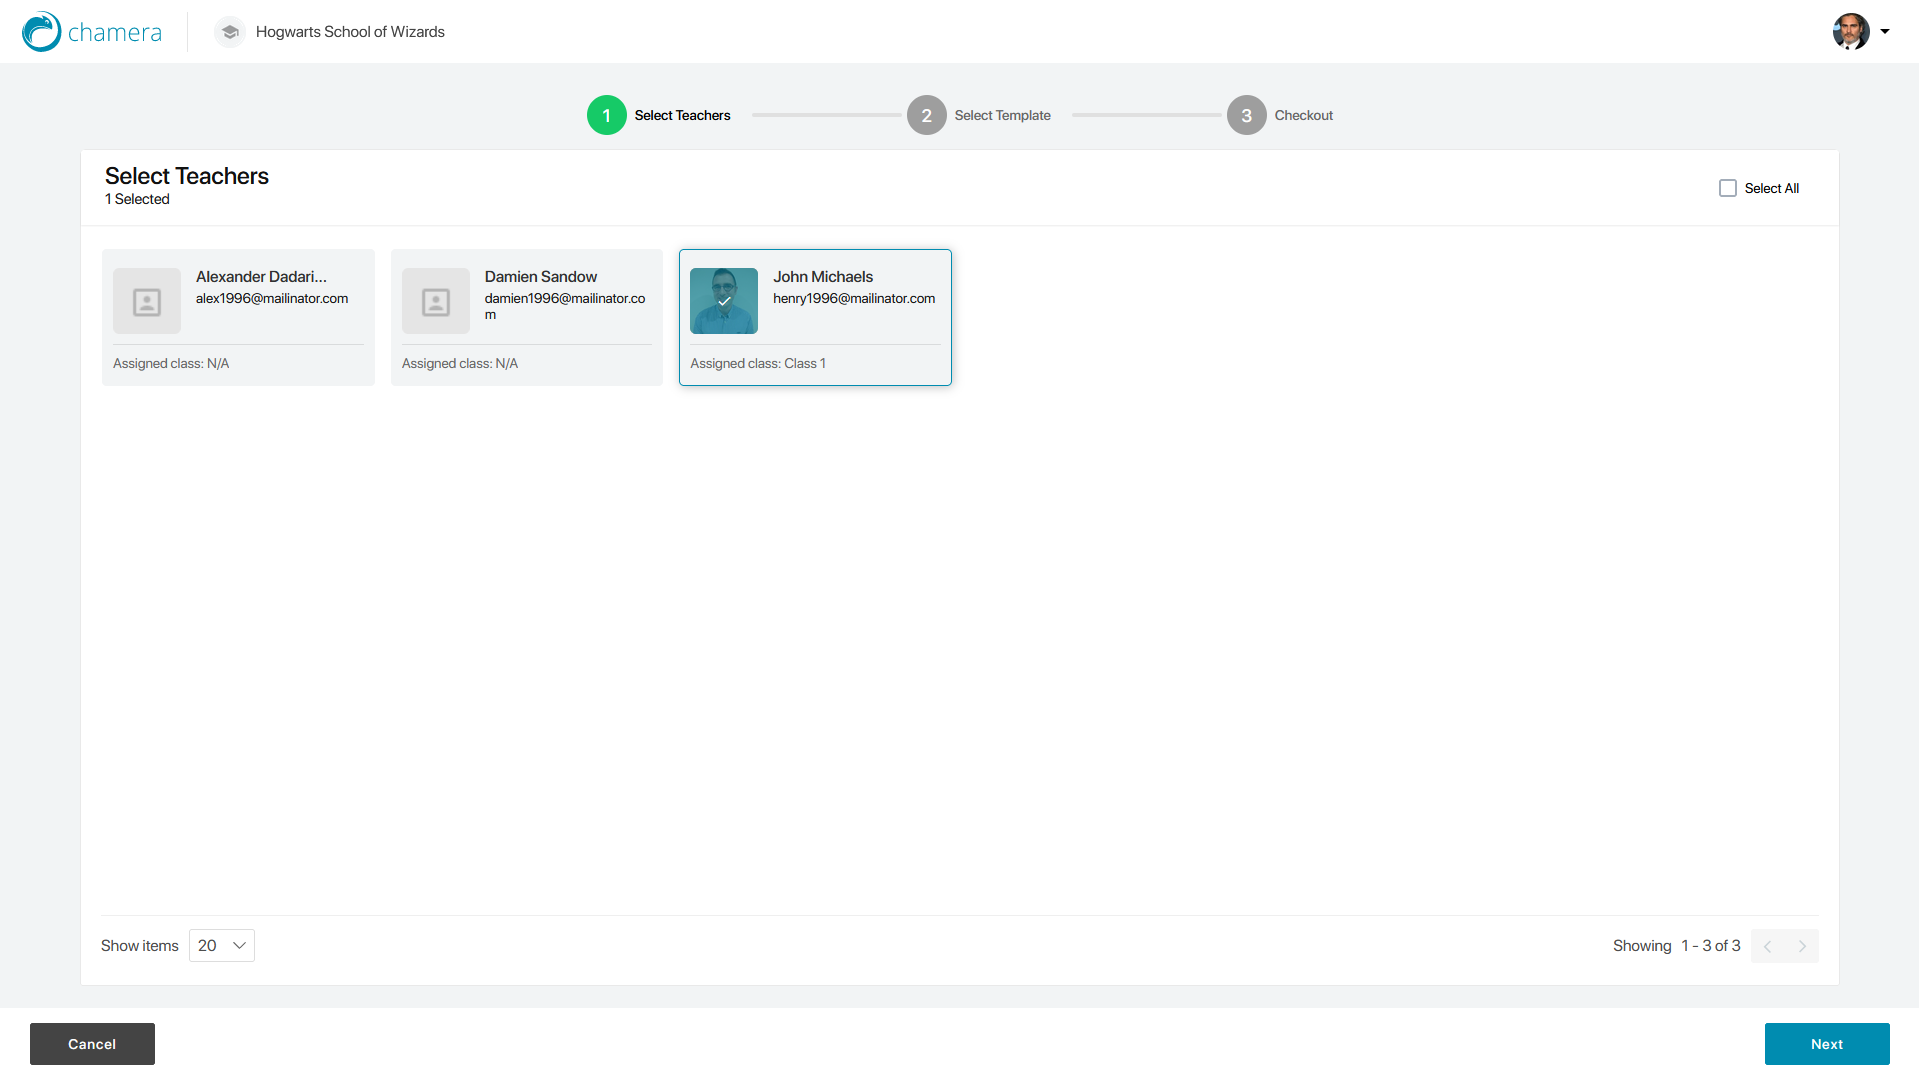
4. Select teachers you want to order ID cards for from the list
5. After selecting teachers, click on the Next button at the bottom right corner, which will direct you to the Select Template step, where you need to pick a template for the ID card
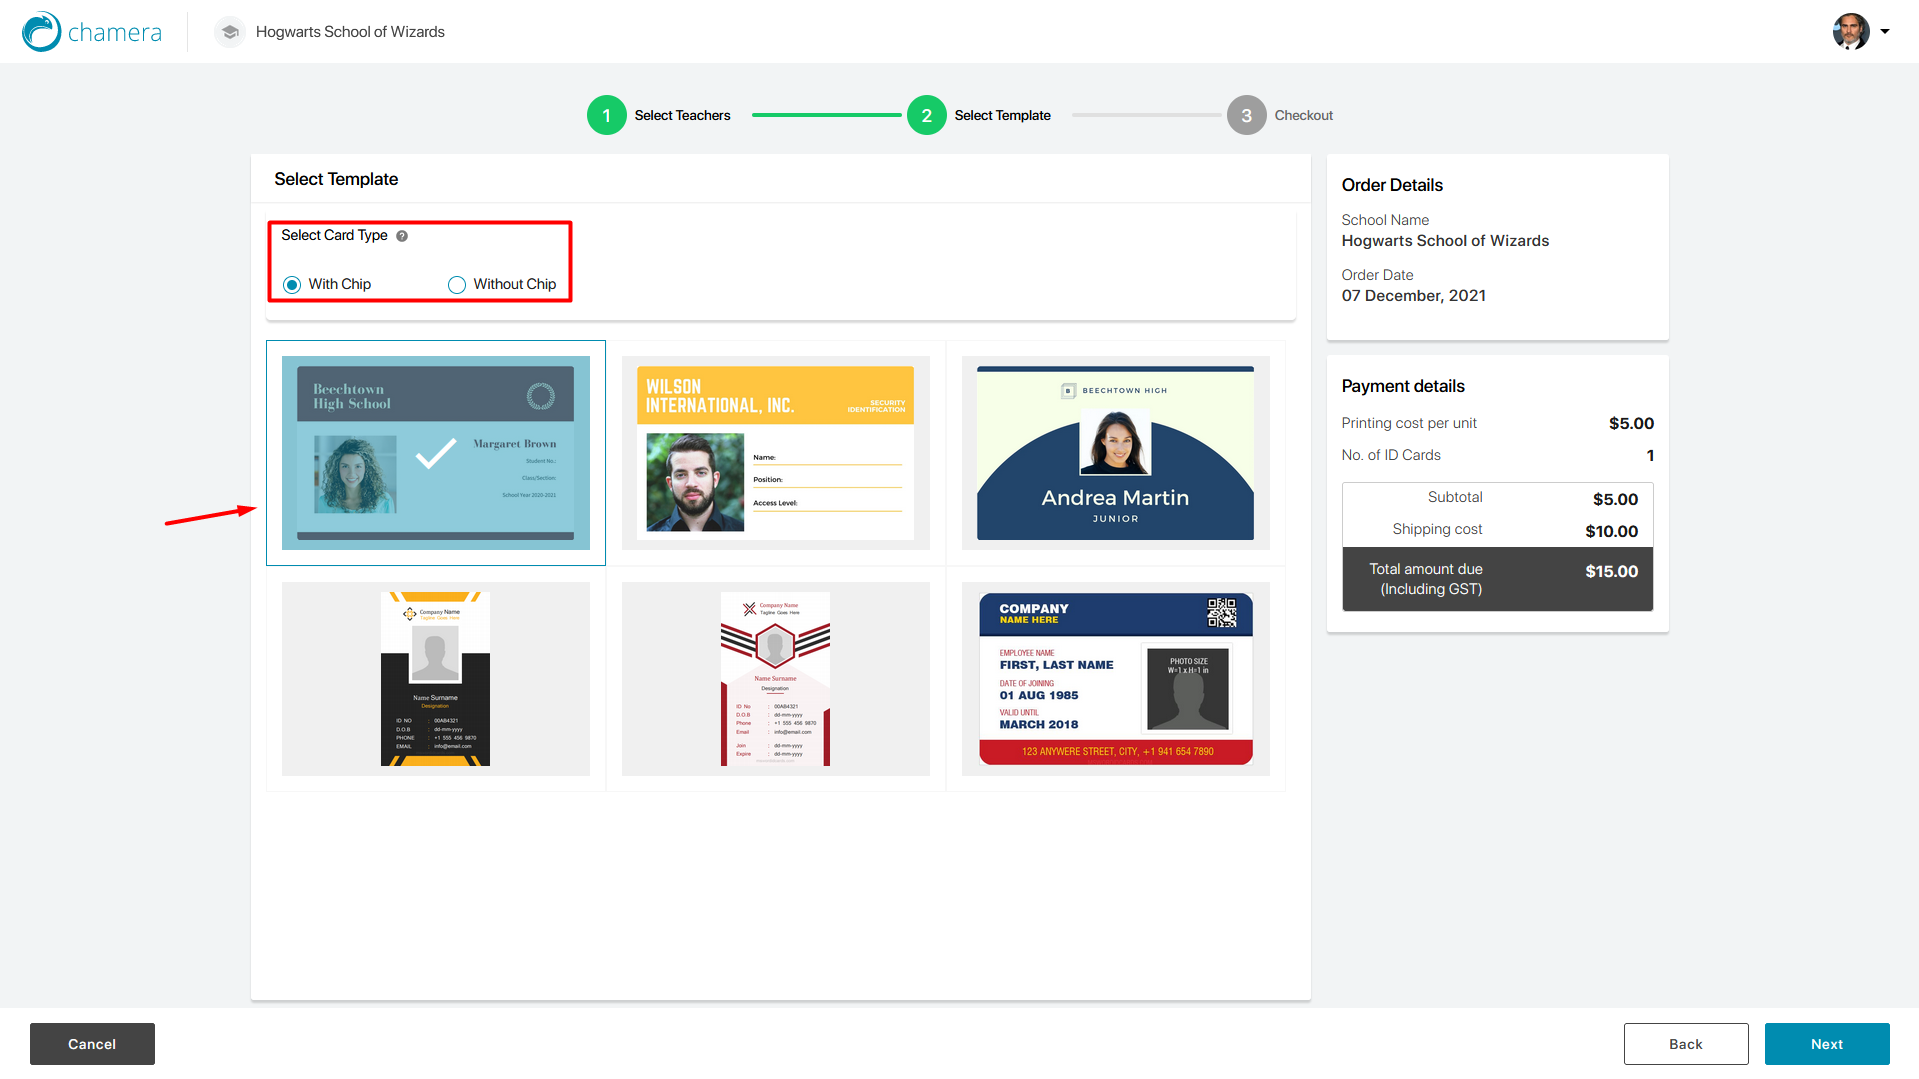
6. Choose an ID card type (With Chip or Without Chip), select a template and then click Next to go to the Checkout page
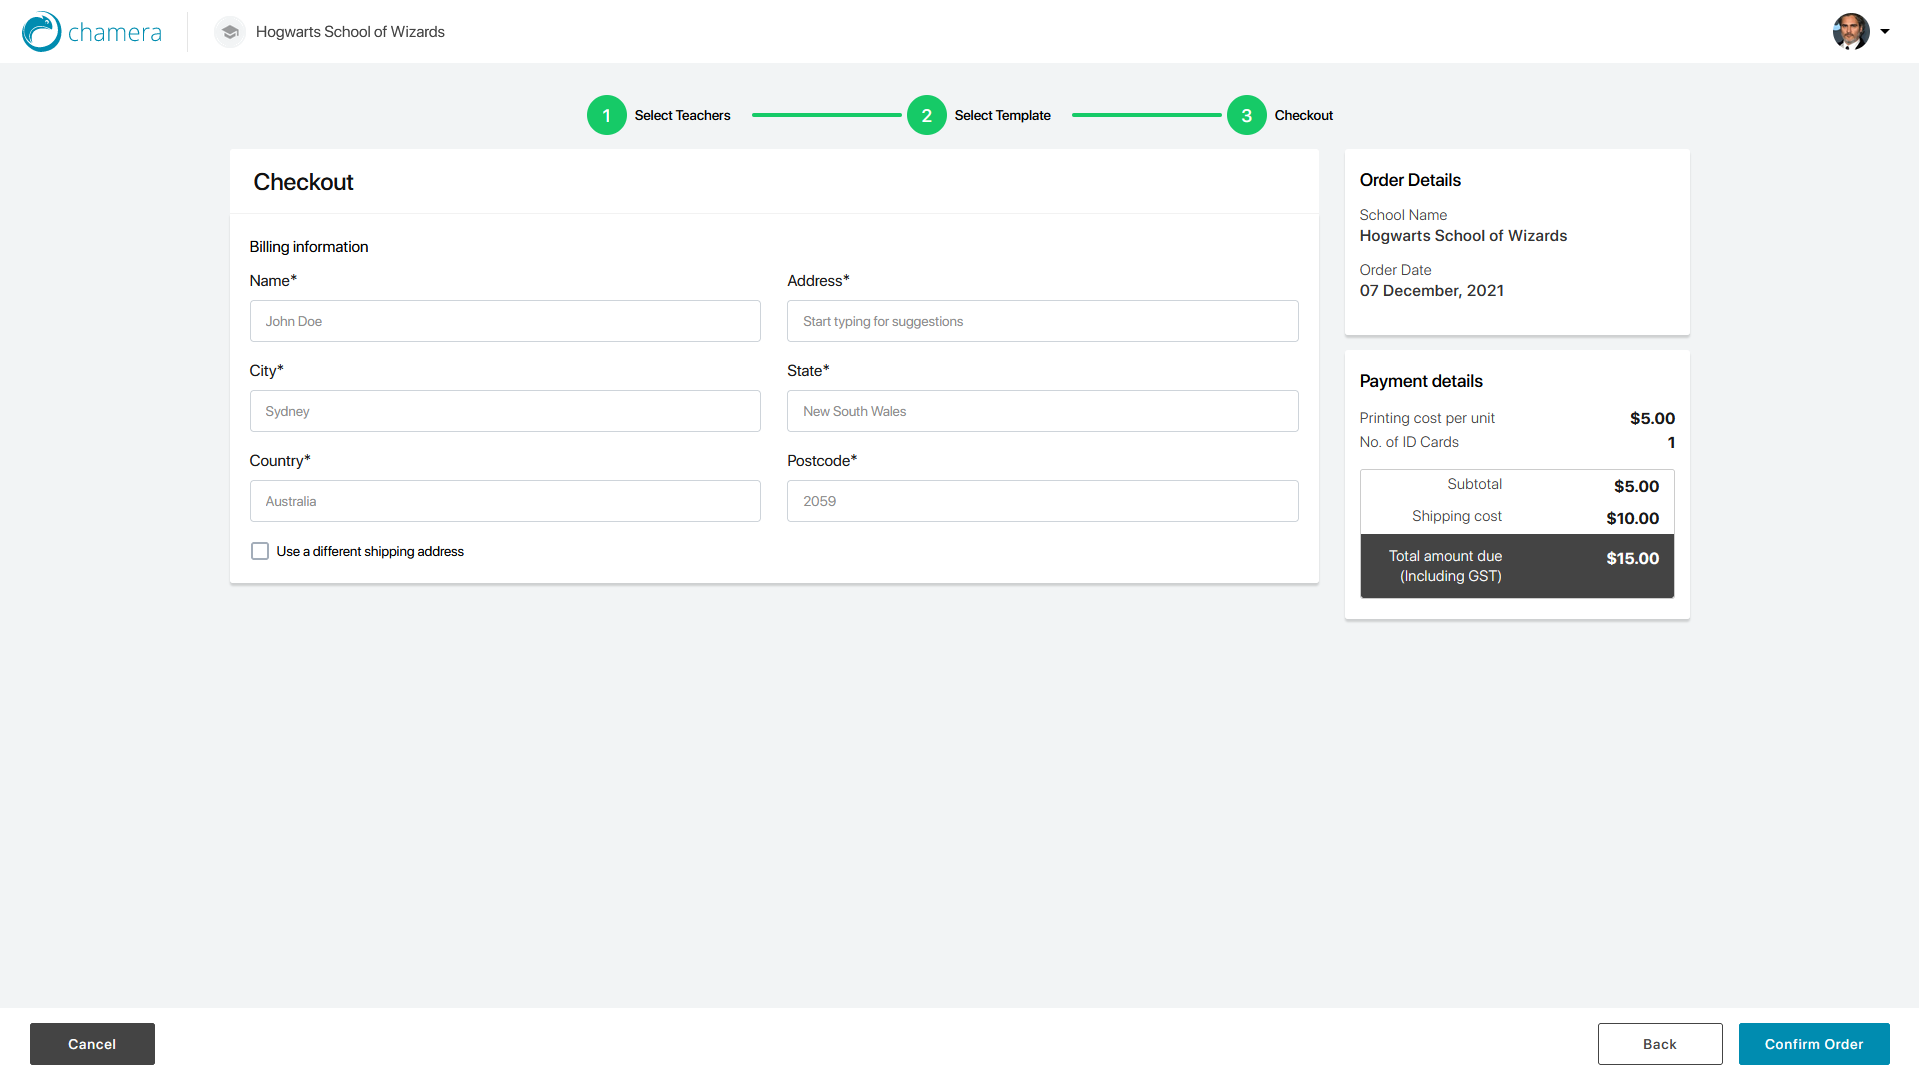
7. On the checkout page, provide your billing and shipping details
8. When done, click on Confirm Order to go to the Payment page

9. Provide your card information and click on Confirm & Pay
10. After clicking on Confirm & Pay, please wait for some time as the system takes a minute to verify the information you provided. You will see a successful payment page when completed.

11. You can check your order details and status by clicking View Order.
Order ID cards for Students
To place an order for Student ID cards:
1. Click on the Place Order button at the top right corner of the Dashboard page
2. From the drop-down, select Student ID Card
3. It will direct you to the first step of the Place Order process, that is, select Student Students
4. Select students you want to order ID cards for from the list. You can also filter the list by class from the Filter By option
5. After selecting students, click on the Next button at the bottom right corner, which will direct you to the Select Template step, where you need to pick a template for the ID card
6. Choose an ID card type (With Chip or Without Chip), select a template and then click Next to go to the Checkout page
7. On the Checkout page, provide your billing and shipping details
8. When done, click on Confirm Order to go to the Payment page
9. Provide your card information and click on Confirm & Pay
10. After clicking on Confirm & Pay, please wait for some time as the system takes a minute to verify the information you provided. You will see a successful payment page when completed.
11. You can check your order details and status by clicking View Order
Order ID cards for Teachers
To place an order for Teacher ID cards:1. Click on the Place Order button at the top right corner of the Dashboard page
2. From the drop-down, select Teacher ID Card
3. It will direct you to the first step of the Place Order process, that is, select teachers
4. Select teachers you want to order ID cards for from the list
5. After selecting teachers, click on the Next button at the bottom right corner, which will direct you to the Select Template step, where you need to pick a template for the ID card
6. Choose an ID card type (With Chip or Without Chip), select a template and then click Next to go to the Checkout page
7. On the checkout page, provide your billing and shipping details
8. When done, click on Confirm Order to go to the Payment page
9. Provide your card information and click on Confirm & Pay
10. After clicking on Confirm & Pay, please wait for some time as the system takes a minute to verify the information you provided. You will see a successful payment page when completed.
11. You can check your order details and status by clicking View Order.
Still have queries? Don't worry! You can drop us your query at contact@chamera.com and we will reach out to you soon.
Related Articles
How to track your order?
After placing an order, you can easily track the status of your order from the web portal. The status will get updated as your order progresses to a new stage. To track your order status: 1. Click on the menu icon at the top right corner 2. ...Getting Started with Chamera
Preparing student ID cards can be a time-consuming ordeal! You have to get the photographer, have the images edited by a professional, approve the changes, and get those printed and delivered to the school. The entire process is a hassle, especially ...How to add student images?
Student images are mandatory if you want to order student ID cards. Student photos can be uploaded in two ways – using the web portal (for school admins) or using the Chamera mobile application (for teachers). This article focuses on both. Adding ...How to add teachers?
The teacher will play a key role in Chamera using the mobile application. Teachers can take photos of students remotely with their devices without needing any photographer using the mobile app. A teacher can also upload their photos from the mobile ...Introduction to Photo Lab
The Photo Lab is an integrated AI solution developed to remove background for student photos where you can add a background of your choice according to the ID card template. So what’s the best part? It’s all for free. To start using Photo Lab: 1. ...